Introduction
You might have seen people love to transform their images into some weird form and share them on online platforms. For example, age progression, shaving head, and many more amusing transformation. At one time these were running a trendy topic on several online platforms.
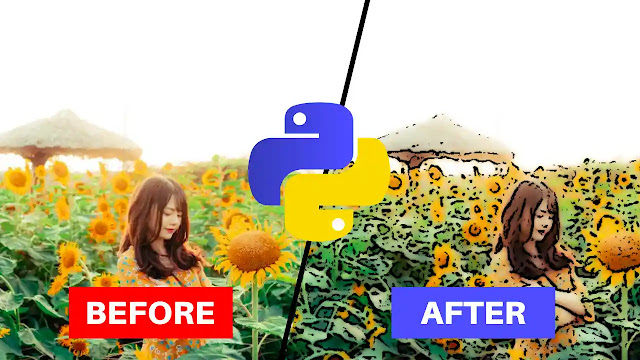
There is one more trendy image effect people love to do with their own. That is cartooning their own image. I have even applied it several times in my own pictures.
There are many online and offline applications you will find to perform this task. But again, since we are python programmers, we will create our own application using python to do the same task.
We are thankful to python for offering a library called OpenCV, which is widely used in Computer Vision and Image Processing. Here, I will use only the OpenCV library to Convert an image to a cartoon using a few lines of python code.
I have divided the whole code into two parts. In the first part, I will show you only the program and describe each line from there most simply so that the objectives of each line are clear to you.
In the second part, you'll see the graphical interface(GUI) part. Here, we will give the application an user interface(UI) so that anyone can access it.
So, without wasting any more time, let's get into the main topic.
👉Visit Also: Image to Pencil Sketch Converter in Python
Requirements
In this case, you do not need to install any third-party tools other than the OpenCV library. Simply type the following command to install it.
Use pip3 instead of pip for Linux.
👉Install OpenCV: pip install opencv-python
Import the module
I recommend you create a separate folder for this task and create a python file with any name you like. Now start writing your code by importing the cv2 module.
import cv2
Open the image
Keep the image in the folder you created just before. Here, we are mentioning the path of the image to the "ImgPath" variable and opening it through the cv2.imread() method. It returns a value and we will store that into the "Img" variable.
You can read more about Image file reading and writing, from here.
ImgPath = "sample.jpg"

Img = cv2.imread(ImgPath)
Resizing the image size
Everyone who uses computers or laptops, has different screen sizes. So, the output image may not fit for everyone perfectly. To avoid any inconsistencies we will resize the image so that it looks the same for everyone.
Img = cv2.resize(Img, (820,540))
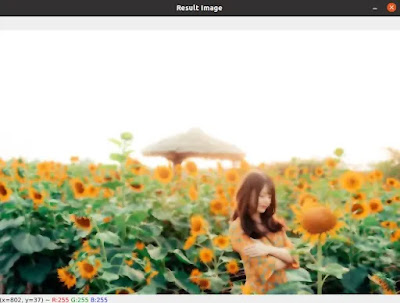
Let's display the image for knowing what it looks like. Here, I'm using a sample image downloaded from Pixabay.
cv2.imshow("Result Image", Img)
cv2.waitKey()
cv2.destroyAllWindows()
Output
Change the color space
Now, you need to apply the cv2.cvtcolor() method to change the color space of the given image to another color space. Here, we are converting BGR to GRAY scale. We passed two parameters to this method. The first one is the image('src'), and the second one is the 'code', which takes an integer value.
There are a lot of 'code' options and each code is represented by a unique 'int' number. Numbers are difficult to remember as compared to the name; that is why we mentioned the 'code' name "cv2.COLOR_BGR2GRAY" instead of passing the integer value of it.
GrayImg = cv2.cvtColor(src=Img, code=cv2.COLOR_BGR2GRAY)
Know more about color space conversion from the OpenCV documentation page.
Again, let's display the image after changing one color space to another.
cv2.imshow("Result Image", GrayImg)
cv2.waitKey()
cv2.destroyAllWindows()
Output
Smoothing the image
Before we apply any filtering technique we need to reduce noises from the given image. For simplicity, we will use cv2.medianBlur() method in this case. Here, the method is taking two parameters from us.
The very first one is 'src' and I already told you about it; but, here, we will pass the gray image(that we create in the previous step) as the source. The second is 'ksize', I chose the value 7 for it. Remember one thing always, you only can use an odd integer value as the 'ksize'.
SmoothImg = cv2.medianBlur(src=GrayImg, ksize=5)
If interested, read more techniques about smoothing an image from here.
We applied the Median Blur to the Gray image("GrayImg"), but what does it look like after that? Let's show.
cv2.imshow("Result Image", SmoothImg)
cv2.waitKey()
cv2.destroyAllWindows()
Output
Determine the threshold
Here, we will apply an image threshold technique to the smoothed image(see the previous section). Since we are working with a coloring image, we can't use the Simple Thresholding here.
So, we will apply Adaptive Thresholding by calling cv2.adaptiveThreshold() method which helps to get different thresholds for different regions of the same image.
Let's discuss about the parameters I passed to the cv2.adaptiveThreshold() function.
- src: It is the source image; in this case, the smoothed image('SmoothImg').
- maxValue: a non-zero value assigned to the pixels.
- adaptiveMethod: It decides how the threshold value is calculated. There are two options available. I select cv2.ADAPTIVE_THRESH_MEAN_C from there.
- thresholdType: Thresholding type must be either THRESH_BINARY or THRESH_BINARY_INV. We will select the first one.
- blockSize: It determines the size of the neighborhood area and it must be an odd integer value.
- C: It is a constant that is subtracted from the mean or weighted sum of the neighborhood pixels.
Edges = cv2.adaptiveThreshold(src=SmoothImg, maxValue=255, \
adaptiveMethod=cv2.ADAPTIVE_THRESH_MEAN_C, \
thresholdType=cv2.THRESH_BINARY, blockSize=7, C=6)
Applying Bilateral Filtering
Now we will apply bilateral filtering to the original image. It helps to reduce unwanted noises from an image especially when the edges are fairly sharp. Let's see which parameters we need to pass to the cv2.bilateralFilter() function and their objectives.
- src: The input image.
- d: The surrounding diameter of each pixel used during filtering. For the non-positive value, it is calculated from sigmaSpace.
- sigmaColor: Filter the sigma in place of the color. To get a cartoonish effect, you need to choose the value >150 for it.
- sigmaSpace: Filter the sigma in place of the coordinates. Again we need to select a larger value for it like the sigmaColor to get a better result.
ColorImg = cv2.bilateralFilter(src=Img, d=9, sigmaColor=220, \
sigmaSpace=200)
If interested, get the documentation of the bilateralFilter() function from here.
After applying this bilateral filtering, you can display the resulting image using the code below.
cv2.imshow("Result Image", ColorImg)
cv2.waitKey()
cv2.destroyAllWindows()
Output
Arithmetic operation on the image
OpenCV allows us to perform arithmetic operations on images. For example, bitwise AND, OR, XOR, and NOT. These are very useful when extracting any part from an image.
In our case, we are applying the cv2.bitwise_and() function which will perform the bitwise AND operation on the elements of the two arrays of the two given images.
As you can see, I passed a total of three parameters in the cv2.bitwise_and() function. The first two are the source images, where the second image is going to merge with the first one.
Later, the 'mask' will be applied to the resulting image. Here, 'mask' = "Edges"(see the "Smoothing the image" section)
One thing to keep in mind, images should have the same dimensions on which the bitwise operation will be performed.
CartoonImg = cv2.bitwise_and(src1=ColorImg,src2=ColorImg,mask=Edges)
Displaying the image
Finally, we got our desired Cartoonish image. Now it’s time to demonstrate what it looks like.
cv2.imshow("Result Image", CartoonImg)
cv2.waitKey()
cv2.destroyAllWindows()
Output
Save the image
You can save the resulting image using just one line of python code.
cv2.imwrite("result.jpg", CartoonImg)
The application
We have successfully created the program for cartoonish an image using python. Now we will give this program a graphical interface so that it looks like a real application.
Requirements
Since I used the Tkinter library to create the application's user interface, you need to install it if you don't already have it. Just type the following command in your Command Prompt or Terminal to install it.
Use pip3 instead of pip for Linux.
👉Command: pip install tk
Now create a new python file, 'app.py' in the same directory where you working in and here is the complete Source code for you. Enjoy!
"""An application to cartoonify any image using python
~ developed by Subhankar Rakshit, PySeek"""

import cv2
import pathlib
import pyautogui
from tkinter import *
from PIL import ImageTk, Image
from tkinter import filedialog

class Image_Cartoonify:
    def __init__(self, root):
        self.window = root
        self.window.geometry("960x560")
        self.window.title('Cartoonify')
        self.window.resizable(width = False, height = False)

        self.width = 740
        self.height = 480

        self.Image_Path = ''

        # ==============================================
        # ================Menubar Section===============
        # ==============================================
        # Creating Menubar
        self.menubar = Menu(self.window)

        # Adding Edit Menu and its sub menus
        edit = Menu(self.menubar, tearoff=0)
        self.menubar.add_cascade(label='Open', menu=edit)
        edit.add_command(label='Open Image',command=self.Open_Image)

        # Menu widget to cartoonify the image
        cartoonify = Menu(self.menubar, tearoff=0)
        self.menubar.add_cascade(label='Cartoonify', menu=cartoonify)
        cartoonify.add_command(label='Create Cartoon', command=self.Cartoonify)

        # Exit the Application
        exit = Menu(self.menubar, tearoff=0)
        self.menubar.add_cascade(label='Exit', menu=exit)
        exit.add_command(label='Exit', command=self.Exit)

        # Configuring the menubar
        self.window.config(menu=self.menubar)
        # ===================End=======================

        # Creating a Frame
        self.frame_1 = Frame(self.window, \
        width=self.width,height=self.height)
        self.frame_1.pack()
        self.frame_1.place(anchor='center', relx=0.5, rely=0.5)

    # Open an Image through filedialog
    def Open_Image(self):
        self.Clear_Screen()
        self.Image_Path = \
        filedialog.askopenfilename(initialdir = "/", \
        title = "Select an Image", \
        filetypes = (("Image files", "*.jpg *.jpeg *.png"),))
        if len(self.Image_Path) != 0:
            self.Show_Image(self.Image_Path)

    # Display the Image
    def Show_Image(self, Img):
        # opening the image
        image = Image.open(Img)
        # resize the image, so that it fits to the screen
        resized_image = image.resize((self.width, self.height))

        # Create an object of tkinter ImageTk
        self.img = ImageTk.PhotoImage(resized_image)

        # A Label Widget for displaying the Image
        label = Label(self.frame_1, image=self.img)
        label.pack()

    def Cartoonify(self):
        # storing the image path to a variable
        ImgPath = self.Image_Path

        # If any image is not selected
        if len(ImgPath) == 0:
            pass
        else:
            # get the file name to be saved after cartoonify the image
            filename = pyautogui.prompt("Enter the filename to be saved")
            # filename with the extension(extension of the original image)
            filename = filename + pathlib.Path(ImgPath).suffix
            # read the image
            Img = cv2.imread(ImgPath)
            Img = cv2.resize(Img, (740,480))
            GrayImg = cv2.cvtColor(src=Img, code=cv2.COLOR_BGR2GRAY)
            SmoothImg = cv2.medianBlur(src=GrayImg, ksize=5)

            Edges = cv2.adaptiveThreshold(src=SmoothImg, maxValue=255, \
            adaptiveMethod=cv2.ADAPTIVE_THRESH_MEAN_C, \
            thresholdType=cv2.THRESH_BINARY, blockSize=7, C=6)

            ColorImg = cv2.bilateralFilter(src=Img, d=9, sigmaColor=220, \
            sigmaSpace=200)

            CartoonImg = cv2.bitwise_and(src1=ColorImg,src2=ColorImg,mask=Edges)

            cv2.imwrite(filename, CartoonImg)

            self.Clear_Screen()
            self.Show_Image(filename)

    # Remove all widgets from the frame_1
    def Clear_Screen(self):
        for widget in self.frame_1.winfo_children():
            widget.destroy()

    # It destroys the main GUI window of the
    # application
    def Exit(self):
        self.window.destroy()

# The main function
if __name__ == "__main__":
    root = Tk()
    # Creating an object of Image_Cartoonify class
    obj = Image_Cartoonify(root)
    root.mainloop()
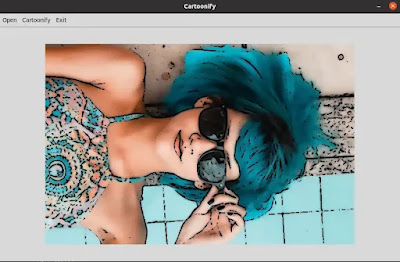
Output
Summary
In this tutorial, we build a very interesting application using python. You can convert any of your images to cartoons using this fun app. We complete this task here in two parts.
In the first part, we develop only the program which gives cartoon effect to a normal image.
In the second part, we transform the simple program into an application by adding a few Tkinter widgets, and then it gives a splendid view.
You can get more lovely Tkinter projects from here.
👉An Advanced Alarm Clock using Python Tkinter
👉A PDF Editor Application using Python - Split, Merge, & Rotate
👉Countdown Timer in Python - with Start and Pause FunctionI tried to cover this topic with complete information and almost I did so. Nevertheless, if you have any doubts somewhere, leave your comments below.
Hope this tutorial has fulfilled the requirements you were searching for. You can find more lovely topics like this from this page of my site, Unique Examples; Check this out also.
That's all for today, see you soon in the next topic.
Thanks for reading!💙
PySeek


